
Last updated November 17, 2026







Free written scope consultation - allowances, timeline, and change-order rules on paper before a single trade is scheduled
Kitchen Remodeling Maintenance Schedule: What to Do and When
Here’s a detail most homeowners learn too late: a quartz countertop maker can void your surface warranty because you wiped it down with the wrong spray. Not a defect. Not an installation error. A cleaner. The same aisle that sells the quartz-safe formula sells a dozen degreasers that will dull and etch the same slab, and the label that matters is often the one you didn’t read. A remodeled kitchen has six distinct maintenance intervals, and none of them are covered by your contractor’s workmanship guarantee once that warranty period ends. What follows is the schedule we hand to Mission Viejo homeowners at job close: grout and caulk joints, cabinet hardware, range hood, under-sink plumbing, counters, and finishes, plus how to keep a log that actually protects your material warranties when something fails.
Quick Answer
A remodeled kitchen needs maintenance on six intervals: monthly (cabinet hinges, drawer slides, hood filter, visible caulk), quarterly (under-sink plumbing inspection, finish touch-ups), every 6 to 12 months (stone resealing, hood duct check), annually (deep grout review, disposal mounts), every 2 to 3 years (re-caulk the backsplash joint), and every 5 years (full system audit). Skipping the documented steps in the manufacturer’s care guide can void your material warranty and weaken your claim against the installer’s workmanship guarantee. The calendar below maps each system to its interval.
Styles & brands we work with
- Kitchen remodeling
- Bathroom remodeling
- Home additions & ADU
- Roofing
- Windows & doors
- Driveway & pavers
- Fence
Table of Contents
- The 5-year maintenance calendar at a glance
- Which warranties require documented maintenance (and how to keep the log)
- Cabinet finish maintenance by type: painted MDF, thermofoil, veneer, solid wood
- The annual under-sink inspection checklist
- How to catch grout and caulk failure before water gets behind the wall
- Range hood filters and duct inspection
- Countertop care: quartz versus natural stone
- Common mistakes to avoid
The 5-Year Maintenance Calendar at a Glance
Every system in a remodeled kitchen fails on its own clock, and the clock starts the day the punch list closes. Here’s how we map it for a typical Mission Viejo kitchen, where the dry inland climate (low humidity, warm summers, mild winters) dries out caulk joints faster than coastal homes a few miles west of us.
| Interval | Task | Why it matters |
|---|---|---|
| Monthly | Lubricate and inspect cabinet hinges and drawer slides; rinse hood filter; eyeball the backsplash caulk line | Hardware binds and grinds when dry; a clogged filter strains the blower; caulk is your first water barrier |
| Quarterly | Wipe down cabinet faces with the manufacturer-approved cleaner; touch up nicks; check under-sink for drips | Finish wear is progressive and cheap to stop early |
| Every 6-12 months | Reseal natural stone counters; inspect the hood duct run and exterior damper | Stone absorbs oils without a seal; a stuck damper pushes moisture and grease back into the room |
| Annually | Deep grout review at the backsplash and floor; check disposal vibration mounts; full under-sink inspection | Grout hairline cracks and a vibrating disposal cause the two most common hidden leaks |
| Every 2-3 years | Cut out and re-caulk the backsplash-to-countertop joint | That joint moves; caulk doesn’t last forever and needs a clean redo, not a smeared patch |
| Every 5 years | Full system audit: all joints, supply lines, hardware, finish condition, hood performance | Catches the cumulative wear before it becomes a remodel |
The 5-year audit, step by step
- Photograph every joint, supply line, and cabinet interior before you start (this becomes your log entry).
- Test every hinge and slide by hand for binding, then tighten any loose screws and lubricate per the hardware maker’s spec.
- Run the hood on high for five minutes and check airflow at the exterior vent; a weak exhaust points to a clogged filter or blocked duct.
- Inspect the under-sink cabinet for staining, soft cabinet floor, or a musty smell, then check each supply line by hand for dampness.
- Re-seal stone counters if water beads no longer form, and re-caulk any joint with a crack or gap.
- File the photos and notes with your closing documents. That folder is your warranty leverage.
If your kitchen was remodeled by another contractor and you don’t have the original spec sheet, a kitchen remodeling in Mission Viejo walkthrough can tell you what you’re actually maintaining, which brand of cabinetry and which surface you’re dealing with.
Which Warranties Require Documented Maintenance (and How to Keep the Log)
Material warranties are conditional, and the condition is usually “follow the written care instructions.” Miss that and the maker has grounds to deny a claim. The manufacturers behind the products we install, whether that’s a Schluter waterproofing system under the tile or a major appliance brand over the range, all publish a care guide and all expect you to follow it. Some even ask for proof of maintenance if a claim goes to review. That’s why we tell every Mission Viejo homeowner to keep a maintenance log from day one.
What the log needs
- Date and the task performed (resealed the island, re-caulked the backsplash joint).
- The product used, by name and manufacturer (that matters for stone and finish claims).
- A photo of the before and after.
- The warranty document itself, filed with the log, plus the install date.
A simple spreadsheet or a paper binder both work. The point isn’t the format; the point is that when you call a manufacturer about a failing finish or a cracked counter, you can show you cared for it as instructed. That log also protects your workmanship claim: if a caulk joint or a plumbing connection fails inside the contractor’s guarantee period, a dated record of when the problem appeared is the difference between a smooth correction and a debate.
We put every price and every guarantee term in writing before work starts, and a completed kitchen carries our 365-Day Done Right Promise. If the work fails inside that window, we come back and correct it at no charge. After that window closes, the log is what keeps your material warranties standing on their own.
Cabinet Finish Maintenance by Type: Painted MDF, Thermofoil, Veneer, and Solid Wood
Cabinet care is not one task; it’s four, because the face material decides the cleaner, the touch-up method, and the failure mode. If you don’t know what you have, look at the cabinet door’s edge and back. The construction tells you.
Painted MDF. Use a damp cloth with mild dish soap and water only. Abrasive pads and ammonia-based cleaners dull the painted film and can soften edges. For chips, a matching touch-up pen works, but the color-fill is temporary on a high-use door. In Mission Viejo’s dry climate, painted MDF doors near the range are the first to show stress at the joints, so check those every quarter.
Thermofoil. This is a vinyl film over a substrate. Heat and moisture cause it to peel at the edges, so keep doors away from direct oven heat and never use a steamer or an abrasive cleaner on it. Wipe with a soft cloth and a mild cleaner. Once thermofoil lifts, it cannot be glued back cleanly, and the door usually needs replacing.
Wood veneer. Clean with a wood-safe polish, not a degreaser, and keep it dry. Veneer fails by lifting at seams when water sits on it. Place a tray under the sink and wipe up splashes the same day. If a seam lifts, a furniture repair tech can often re-glue it before the veneer cracks.
Solid wood. The most forgiving of the four. Clean with a damp cloth, use a wood conditioner periodically, and touch up scratches with a wax stick. Solid wood also moves with humidity, which matters in Mission Viejo: our seasonal swings are modest but real, and door alignment shifts a little. That’s a hinge adjustment, not a defect. Our brands, KraftMaid and Wellborn among them, publish per-finish care guides, and knowing exactly which finish you have is why we install from a documented roster instead of whatever’s on the truck.
The Annual Under-Sink Inspection Checklist
The cabinet under the sink is the most likely spot in the kitchen for hidden water damage, because it’s dark, enclosed, and holds the supply lines and drain. Once a year, empty it and go through the checklist. Ten minutes now saves a cabinet floor and a drywall repair later.
- Supply line condition. Look at the braided lines on the faucet. A bulging, cracked, or stiff line at the fitting is a failure candidate. Check the date on the fitting if it’s marked, and replace lines on a fixed schedule rather than waiting for a leak.
- P-trap joint integrity. Run water, then check each slip nut and the P-trap’s curved section for a bead of moisture. A drip shows as a mineral stain or a dark ring on the cabinet floor.
- Cabinet floor moisture check. Press the back of your hand to the particleboard or plywood floor. Cool and damp means a slow leak. A soft, swollen edge means water has already been sitting.
- Disposal vibration mounts. Run the disposal and watch the attachment to the sink. Vibration that shakes the whole drain assembly loosens joints over time. A firm mount and balanced disposal stop it.
- Faucet base and soap dispenser seals. Wipe around the base and look for water traveling under the rim, not just down the spout.
If you find a failing supply line or a joint you’re not sure about, a licensed plumber is the right call. A general contractor in Mission Viejo can also tell you whether a wet cabinet warrants opening the wall behind it. Our technicians have up to 22 years of experience spotting the signs a homeowner might walk past.
How to Catch Grout and Caulk Failure Before Water Gets Behind the Wall
The joint where the backsplash meets the countertop is a movement joint. The counter and the wall move independently, so caulk goes there, not grout. When that caulk cracks, water weeps down behind the counter and into the cabinet or wall cavity, and by the time you see a stain under the sink, the damage is already done. That’s the whole reason for the calendar.
What early failure looks like
- A hairline crack running along the caulk line. It’s the first sign, and it’s easy to miss unless you look at a shallow angle with a flashlight.
- A gap at the caulk ends near a sink or a corner where the line terminates.
- Discoloration or discolored grout next to the caulk, which usually means moisture is wicking through.
- A soft or crumbling grout line on the backsplash tile itself, not just the caulk joint. Grout that crumbles near the counter is a warning.
- Swollen cabinet floor or a musty smell under the sink, which means water has traveled farther than the joint.
When you find a failed joint, a proper fix means cutting out the old caulk completely, cleaning and letting it dry (which takes longer here in our seasonal humidity swings), and laying a fresh bead rated for kitchen use. A smeared patch over old caulk fails again in months. Tile and waterproofing systems such as Schluter are built to keep water out when the joints are right; the joint is your maintenance, not the system’s problem.
Range Hood Filters and Duct Inspection
The range hood is a safety system, not just a fan. A clogged filter cuts its ability to clear smoke and grease, and grease that builds up in a duct is a fire risk. Monthly, pull the filters and wash them. Most metal mesh filters can go in the dishwasher, but check the manufacturer’s guide; some require hand washing. Replace disposable filters on the schedule printed on the packaging.
Every 6 to 12 months, look at the duct run if it’s accessible, and check the exterior vent and damper for a stuck or noisy flap. A bird or a nest in the vent, a blocked damper, or a crimped flexible duct all cut airflow, and you’ll notice it as lingering smoke and a hood that sounds strained. If your hood’s specs aren’t in your closing package, an audit is worth doing; the wrong duct size or a blocked damper is a genuine safety issue, and it’s not a do-it-yourself fix inside the wall.
Countertop Care: Quartz Versus Natural Stone
Quartz and natural stone need different care, and mixing them up is where warranty claims die. Quartz (engineered stone) is non-porous and generally does not need resealing, but it will dull or etch under the wrong cleaner. Natural stone (granite, marble, and similar) is porous and needs periodic sealing.
The rule for quartz: use a pH-neutral stone cleaner or mild dish soap and water. Skip the everyday kitchen degreaser and any product with a harsh or high-pH formula. Wipe up oil and wine promptly. The rule for natural stone: test the seal every few months by dropping water on the surface. If the beads hold, the seal is good. If the water soaks in, it’s time to reseal, typically once a year for a kitchen. The manufacturer’s care guide for your specific surface (Caesarstone and Cambria are among the engineered lines we work with) states the products that will not void your warranty. Follow it exactly.
Getting a bathroom remodeling in Mission Viejo done at the same time? The same logic applies to your stone vanity, so put it on the same calendar.
Common Mistakes to Avoid
- Using a degreaser on quartz. That’s the exact mistake that voids a surface warranty. Buy a stone-specific cleaner and read the label before the first wipe.
- Grouting a movement joint. Grout where caulk belongs cracks in the first dry season. The backsplash-to-counter joint needs caulk, full stop.
- Skipping the under-sink check. A slow drip you don’t see costs a cabinet floor and possibly wall board. Ten minutes a year prevents it.
- Ignoring a vibrating disposal. The vibration loosens the drain joints above it and can shift the whole assembly. A firm mount fixes the source.
- Steaming thermofoil and painted doors. Heat and moisture lift the film and dull the paint. Clean with a damp cloth, not a steamer.
- Never resealing stone. A granite counter that soaks up oil is very hard to bring back. Reseal on schedule, and test with water drops to know when.
- Not keeping the log. No dates and no receipts means a manufacturer can deny a claim you’d otherwise win. Over a Mission Viejo kitchen’s first five years, that log is the single most useful document you can keep.
See the difference
 Before
 After
 Before
 After
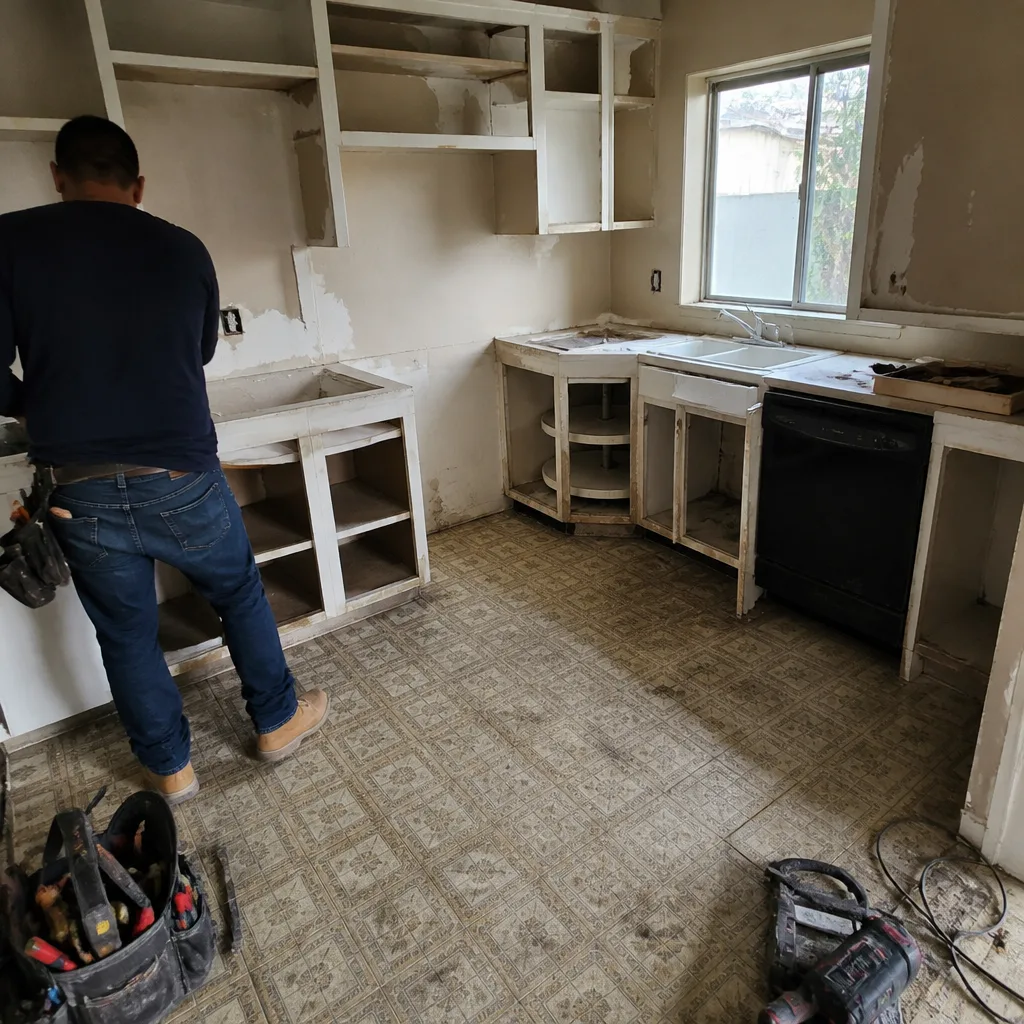 Before
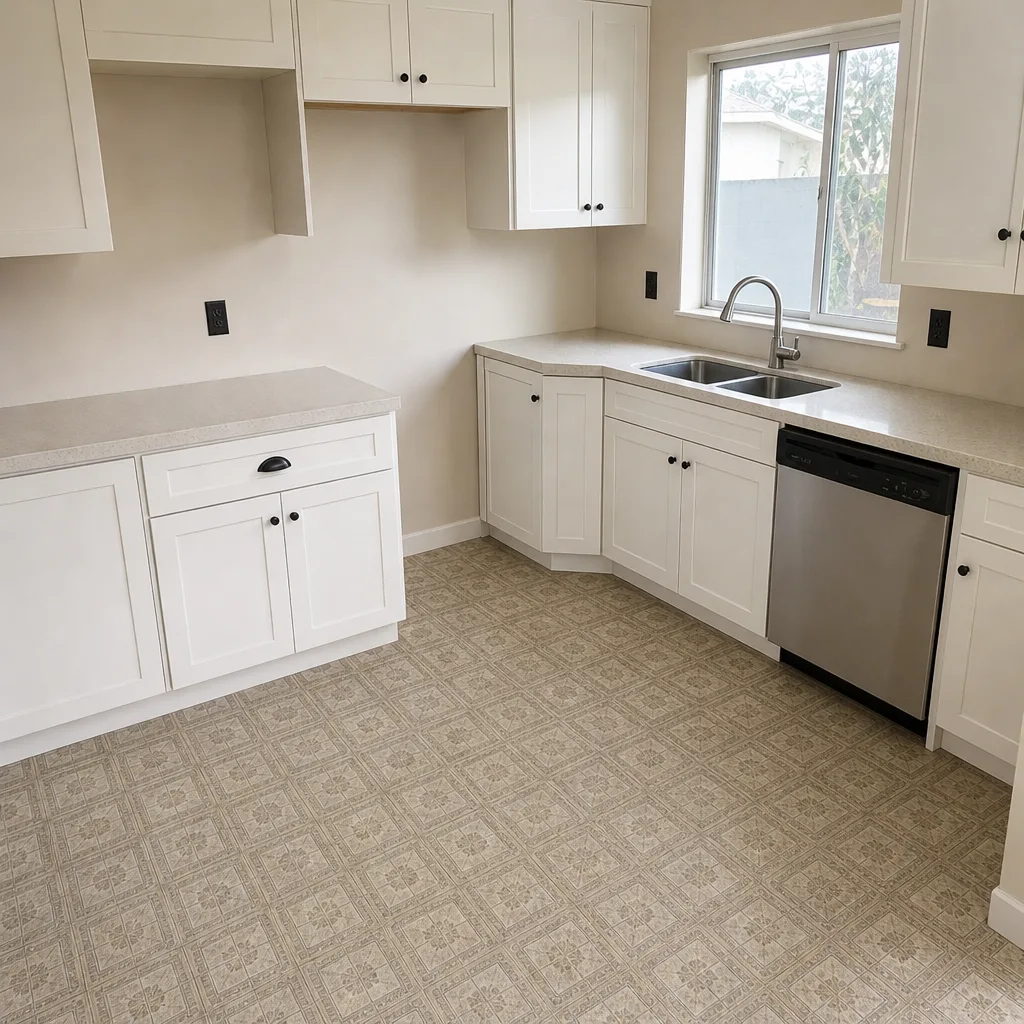 After
When to Call a Professional

Some of this belongs on your calendar; some belongs in a pro’s hands. Call a professional when you find a failed supply line or a leak at a joint you can’t isolate, when grout failure near the counter suggests water has traveled behind the wall, when the hood duct or damper is blocked or undersized, when a cabinet finish is peeling at the seams, or when a counter has soaked up oil or lost its seal and you want it corrected properly rather than patched.
Bradford Remodeling Co Mission Viejo offers free estimates in Mission Viejo, and every project gets a written price before any work starts. Call (833) 734-2429 to schedule your free estimate. A real person answers, any time. If you’re starting the next project rather than maintaining the last one, our Bradford Remodeling Co Mission Viejo home page lays out how we work.
Frequently Asked Questions
Resealing stone counters and re-caulking the backsplash-counter joint is typically a small, defined job, and the exact number depends on how many square feet of stone and how many linear feet of joint you have; call (833) 734-2429 for a written quote before work starts. Many homeowners pair it with a broader maintenance visit. Estimates are free and the price you’re quoted is the price you pay.
It can. Material warranties are conditional on following the manufacturer’s written care instructions, so the wrong cleaner on quartz or a stone surface left unsealed gives the maker grounds to deny a claim. Keeping a dated log with before-and-after photos is your protection. Call (833) 734-2429 if you need help identifying what you have.
About once a year for a kitchen is the usual schedule, but test it: drop water on the surface and watch whether beads form. If the water soaks in, it’s time. Mission Viejo’s dry stretches can dry stone out, so checking every few months is smart. Call (833) 734-2429 for a reseal quote.
Run the water, then run the back of your hand along the bottom of each supply line and around the P-trap joints; a bead of moisture or a cool damp feel means a leak. Check the cabinet floor for a soft or swollen edge too. Call (833) 734-2429 if a line or joint needs replacing.
No. The joint where the countertop meets the backsplash is a movement joint and must be caulk, not grout. You can re-caulk a clean, dry joint yourself, but if water has already reached the cabinet or wall, it’s a professional repair. Call (833) 734-2429 for an estimate.
Our workmanship guarantee runs a full year from completion: the 365-Day Done Right Promise. If the work fails inside that window, we return and correct it at no charge. Material warranties run longer and depend on documented care, which is why the maintenance log matters. Call (833) 734-2429 for the specifics on your project.
The Bottom Line

A remodeled kitchen holds up on a schedule, not on luck. Six intervals cover everything: monthly hardware and filters, quarterly finishes, twice-yearly stone and duct checks, annual under-sink and grout reviews, re-caulking every 2 to 3 years, and a full audit at five. Do them, log them, and both your material warranties and your installer’s guarantee stay valid and useful. Miss them and you’re the one paying to correct what a half-hour of care would have avoided. If you’d rather leave the checks to pros, Bradford Remodeling Co Mission Viejo offers free estimates in Mission Viejo and a written price on every job. Call (833) 734-2429.
Written by the team at Bradford Remodeling Co Mission Viejo.