Last updated November 17, 2026




Free written scope consultation - allowances, timeline, and change-order rules on paper before a single trade is scheduled
Kitchen Remodeling Troubleshooting: Common Problems and How to Fix Them
A range hood ducted into the attic instead of through the roof is one of the most common shortcuts we find in Mission Viejo kitchens. It passes a visual inspection because the hood runs, the fan spins, and the cabinets look finished. What it doesn’t do is remove grease vapor or heat, and the fire risk it creates only shows up when you’re searing something on a back burner at high heat. The same pattern repeats across most kitchen failures: the problem was buried in the rough-in, not the finish. This guide walks through the four root causes behind nearly every kitchen remodel failure we troubleshoot in Mission Viejo – ventilation, circuit capacity, sink-run waterproofing, and cabinet installation over uneven floors – and shows you how to diagnose which one you’re living with so you know who to hold accountable.
Quick Answer
Most kitchen remodel problems trace to one of four root causes: a range hood that vents into the attic rather than outside, missing or undersized electrical circuits, failed waterproofing under the sink base, or cabinets installed without correcting floor-level variation. Diagnosing which one you have takes 10 to 30 minutes of careful checking, and it tells you whether the fix belongs to the original installer, the cabinet supplier, or a licensed electrician.
Styles & brands we work with
- Kitchen remodeling
- Bathroom remodeling
- Home additions & ADU
- Roofing
- Windows & doors
- Driveway & pavers
- Fence
Table of Contents
- Problem 1: The Range Hood That Doesn’t Vent Outside
- Problem 2: Missing Circuits and Overloaded Kitchen Wiring
- Problem 3: Sink Base Water Damage and Failed Waterproofing
- Problem 4: Cabinet Shimming, Scribe Molding, and the 18-Month Gap
- How to Document a Kitchen Defect for a Complaint or Small Claims Filing
- Permits and Inspection: What Should Have Been Signed Off
- What Kitchen Remodel Repairs Cost in Mission Viejo
- Common Mistakes to Avoid
Problem 1: The Range Hood That Doesn’t Vent Outside
The incense test is the fastest kitchen diagnostic a homeowner can run. Light a stick, hold it under the hood at cooking height, turn the fan to high, and watch the smoke. If it gets pulled straight up and out, the hood is moving air. If it drifts sideways, lingers, or blows back down, you have poor capture. Now step outside and check the exterior wall or roof for a vent hood flap. If there isn’t one, the exhaust is dumping into your attic, a soffit cavity, or a cabinet chase, and that’s a serious problem.
Why Mission Viejo homes get hit hard by this: a lot of the housing stock here was built during the tract boom of the 1970s through 1990s, when recirculating hoods and short duct runs were common. Add a remodel where the range moved to an interior wall and the cheap fix became a flex duct dropped into the crawl space. Our warm, dry climate hides the moisture problem – you won’t see condensation the way a coastal homeowner would – but grease vapor still settles into attic insulation and wood framing, and the fire risk doesn’t care about the weather.
What a proper ventilation fix involves:
- Confirming whether the hood is ducted or recirculating. Recirculating hoods use charcoal filters and don’t vent anywhere. They’re legal in some jurisdictions but aren’t real ventilation for a gas range.
- Checking duct diameter. A 30-inch hood typically needs 6-inch rigid duct or larger. A 4-inch flex run will choke performance no matter how powerful the fan is.
- Confirming the termination point. Rigid metal duct to a wall or roof cap with a backdraft damper. Not flex, not soffit discharge, not a dead-ended cabinet.
- Sealing the penetration. Every duct joint gets foil tape, not duct tape, and the exterior cap gets caulked and flashed.
If your inspection turns up a hood ducted into the attic, that’s a defect worth fixing before you finish anything else. A licensed general contractor can scope the duct run, patch the ceiling or roof penetration, and coordinate the electrician if the hood needs a higher-amp circuit. If you’re planning a larger kitchen rework, our kitchen remodeling in Mission Viejo page walks through how we sequence ventilation before cabinetry goes in.
Problem 2: Missing Circuits and Overloaded Kitchen Wiring
A code-compliant kitchen needs four dedicated 20-amp circuits minimum: two small-appliance circuits serving the countertop receptacles, one for the dishwasher, and one dedicated circuit for the refrigerator. A gas range pulls a dedicated circuit too, and an electric range or wall oven needs a 240-volt circuit sized to the appliance. If your kitchen trips breakers when the microwave and toaster run together, you don’t have all four.
How to check without opening the panel – though we’d rather you let an electrician do this part, because panel work is genuinely dangerous:
- Map your breakers with a helper and a lamp. Turn off one breaker at a time, note which receptacles and appliances go dead, and write the map on a card taped inside the panel door.
- Count the 20-amp breakers labeled for the kitchen. If you find fewer than four, you’re undersized.
- Look for signs of overload: warm faceplates, discolored outlets, breakers that trip repeatedly. Any of those is a stop-and-call-an-electrician situation, not a DIY repair.
- Check GFCI protection. Receptacles within 6 feet of the sink need GFCI protection, and so does the dishwasher circuit.
We see this constantly in ranch-era Mission Viejo homes where the original 1978 kitchen had one circuit for everything and a remodel added a disposal, a microwave, and a wine fridge without upgrading the panel. The electrical panel and wiring are not a repair we’d ever suggest a homeowner tackle – 120-volt shocks cause real injuries every year, and panel work is where fires start. Call a licensed electrician, get the panel checked, and have them issue a written scope for what’s missing. If you’re working with our team, that scope comes back as a line item on your written price before any work starts – part of Bradford Remodeling Co Mission Viejo home standard, which puts every price and guarantee in writing.
Problem 3: Sink Base Water Damage and Failed Waterproofing
The area under your kitchen sink is the most abused cabinet in the house. A slow drip from a supply line or a pinhole in the drain traps runs down the cabinet back and soaks the particleboard shelf and the toe kick. Because particleboard swells and doesn’t recover, a leak that’s only 6 months old can already mean a full sink base replacement.
What a proper sink base should have under it:
- A waterproof liner or a sealed, painted base. Stainless steel, PVC, or a bonded vinyl mat over sealed plywood are the standard options.
- A water alarm. Cheap, effective, and worth every dollar – a $15 puck alarm on the cabinet floor catches leaks before they spread.
- Cabinet sides and back covered with a moisture-resistant finish, not raw particleboard.
- Supply line protection: braided stainless steel lines instead of the older rubber or poly lines, and shutoff valves in working order.
How to spot water damage that’s already started: pull everything out of the sink base and look for dark stains or ripples on the back panel, a soft shelf, a musty smell, or bubbling paint on the toe kick. Check under the dishwasher too – the same failure pattern plays out there. If you find swelling, the shelf and base need replacing, and the repair involves pulling the sink, replacing the cabinet bottom, installing a proper liner, and putting everything back with new supply and drain connections. Our bathroom remodeling in Mission Viejo team sees the same failure pattern under bathroom vanities, which is why we always spec a waterproof base on wet cabinets – the material cost is small compared to replacing water-damaged cabinetry twice.
Problem 4: Cabinet Shimming, Scribe Molding, and the 18-Month Gap
No floor in Mission Viejo is level. Slab foundations here settle, and tile over thinset over slab creates low and high spots that can’t be removed. That’s normal. What isn’t normal is cabinets installed without correcting for it.
A rushed install sets cabinets on the highest point of the floor and lets the rest ride. It looks fine on the day of install. Eighteen months later you notice the door on the corner cabinet won’t stay closed, the drawers on the sink run pull crooked, and there’s a visible gap under one end. That’s racking – the cabinet box was never sitting square, so the hardware and doors were fighting the geometry from day one.
What proper installation looks like:
- Lay out the cabinet run on the floor and mark the high point. Every cabinet is leveled off that plane.
- Shim to fill gaps, using composite shims (never wood, which crushes and rots over time). Shims at each corner, then check level side to side and front to back.
- Scribe molding runs along the gap between cabinet and wall, fitted and coped to the wall’s actual contours – not just caulked. Scribe molding takes the wall’s high and low spots and covers them without a wavy line.
- Filler strips at cabinet ends and against walls, sized to the actual gap, then cabinet screwed into studs, not just the drywall.
- Doors and drawers hung and adjusted after all cabinet boxes are level. Never before.
What you’re checking at close: run a 4-foot level across the cabinet face frame. If there’s visible rock, it wasn’t leveled. Open and close every door and drawer – if any rub or hang, hardware adjustment hasn’t been done. Scribe molding, if present, should be a single fitted piece, not caulk smeared over a gap. That’s part of the “squared away” close our crew delivers: clean site, documented scope, and a signed written guarantee in your hand.
How to Document a Kitchen Defect for a Complaint or Small Claims Filing
If a contractor walks off the job or a defect shows up inside the term of a written contract, you need evidence that a third party can read and understand. Build the record now while the evidence is fresh.
- Photos with context. Take wide shots of the whole kitchen, then close-ups of the defect. Include a tape measure or level in the frame when scale matters. Photograph each defect from two angles, and date-stamp the images if your phone doesn’t automatically.
- Measurements. Actual gap width, door sag, out-of-level in fractions of an inch. If a hood is ducted into the attic, photograph the attic showing no exterior termination – this is often the single strongest piece of evidence.
- The original contract and specification. Every line item you paid for should be listed. If the contract says “vent hood to exterior” or “GFCI at sink,” you have a written spec against which the work can be judged.
- Written demand letter. Send it certified mail, return receipt requested. Structure it as: (a) statement of what was contracted, (b) statement of what was delivered, (c) the specific dollar amount you’re asking to be corrected or refunded, (d) a deadline for response, usually 14 to 30 days. Keep it factual.
- CSLB complaint. California’s Contractors State License Board runs an online complaint process. You’ll need the contractor’s license number, which you can look up on the CSLB website. Include your evidence package with the complaint.
- Small claims. In California, small claims handles up to $12,500 for individuals. Have a copy of the contract, photos, and your demand letter ready to file.
The best time to prevent this paperwork is at contract signing. Every project we run starts with a written price before any work starts – which is part of The Garrison Standard, the framework behind every Bradford Remodeling job. A general contractor in Mission Viejo should hand you a written scope that a claims examiner could read if it ever came to that.
Permits and Inspection: What Should Have Been Signed Off
Not every kitchen remodel needs a permit. Moving a wall, adding or relocating electrical, changing plumbing rough-in, or installing a new range hood duct all trigger permit requirements under California code and Mission Viejo’s local building department rules. A cosmetic remodel – cabinet refacing, new counters over existing cabinets, paint – usually doesn’t. The dividing line is whether the work touches structure, mechanical, electrical, or plumbing systems.
What to ask for from the contractor:
- The permit number, posted on site during the job.
- Inspection sign-offs from the city, which the contractor should hold and pass to you.
- A final inspection signed off before you release final payment.
If work was done without a permit and you’re now trying to sell, the problem becomes yours to solve. That’s the accountability piece we build into every job. Pull the permits, get the inspections passed, hand the homeowner the paper.
What Kitchen Remodel Repairs Cost in Mission Viejo
These ranges reflect what we see for repair work in Mission Viejo and surrounding south Orange County – a market where contractor labor runs higher than inland counties and material costs have climbed with the remodel demand. Use these as a benchmark, not a bid, and get a written price before anything starts.
- Range hood re-duct to exterior: $650 – $1,800, depending on whether roof or wall penetration, duct length, and whether the hood itself is being replaced.
- Adding a dedicated 20A circuit (kitchen): $450 – $950 per circuit, including permit and inspection on the electrical scope.
- Panel upgrade to support added kitchen load: $2,200 – $4,500, including permit. Costs climb if the main service needs to be upsized.
- Sink base cabinet replacement (with waterproof liner): $600 – $1,400, installed, matched to existing cabinet finish if possible.
- Cabinet re-shim and re-hang: $400 – $1,200, depending on cabinet count and whether scribe molding needs replacing.
- GFCI receptacle replacement: $125 – $250 per receptacle, including inspection if part of a permitted scope.
Every one of those numbers goes on a written price before any work starts on a Bradford Remodeling job – no numbers that move at the door. The brand roster behind those repairs is documented: KraftMaid and Wellborn cabinets, Cambria and Caesarstone counters, Kohler and Moen fixtures. When we replace a sink base, you know which manufacturer’s cabinet it is and what warranty carries back to you.
Common Mistakes to Avoid
- Accepting an “as-is” recirculating hood because the installer says it’s fine. A recirculating hood doesn’t remove grease or heat and doesn’t satisfy serious cooking ventilation – spell out rigid duct to exterior in the contract.
- Skipping the breaker map before moving into a finished kitchen. You’ll spend 10 minutes with a lamp and save yourself a decade of guessing which breaker controls the disposal.
- Letting the contractor start before the written scope is signed. “We’ll figure out the counters later” turns into a change order. Mission Viejo homeowners know this one well – the second number at the door is where a project’s trust dies.
- Installing cabinets before the floor is leveled. In older Mission Viejo homes, slab settling and tile-over-slab create gaps that a shimmed box will hide but won’t fix. Level it, then install.
- Putting particleboard under a sink without a liner. A $20 liner is the single cheapest insurance in a kitchen. A $1,400 cabinet replacement is the alternative.
- Releasing final payment before inspection sign-offs are in hand. Final payment is your last leverage. Keep it until the city has signed the final.
- Doing electrical yourself. Of everything in this guide, panel and wiring work is where the severe injuries happen. Hire a licensed electrician and get their scope in writing.
See the difference
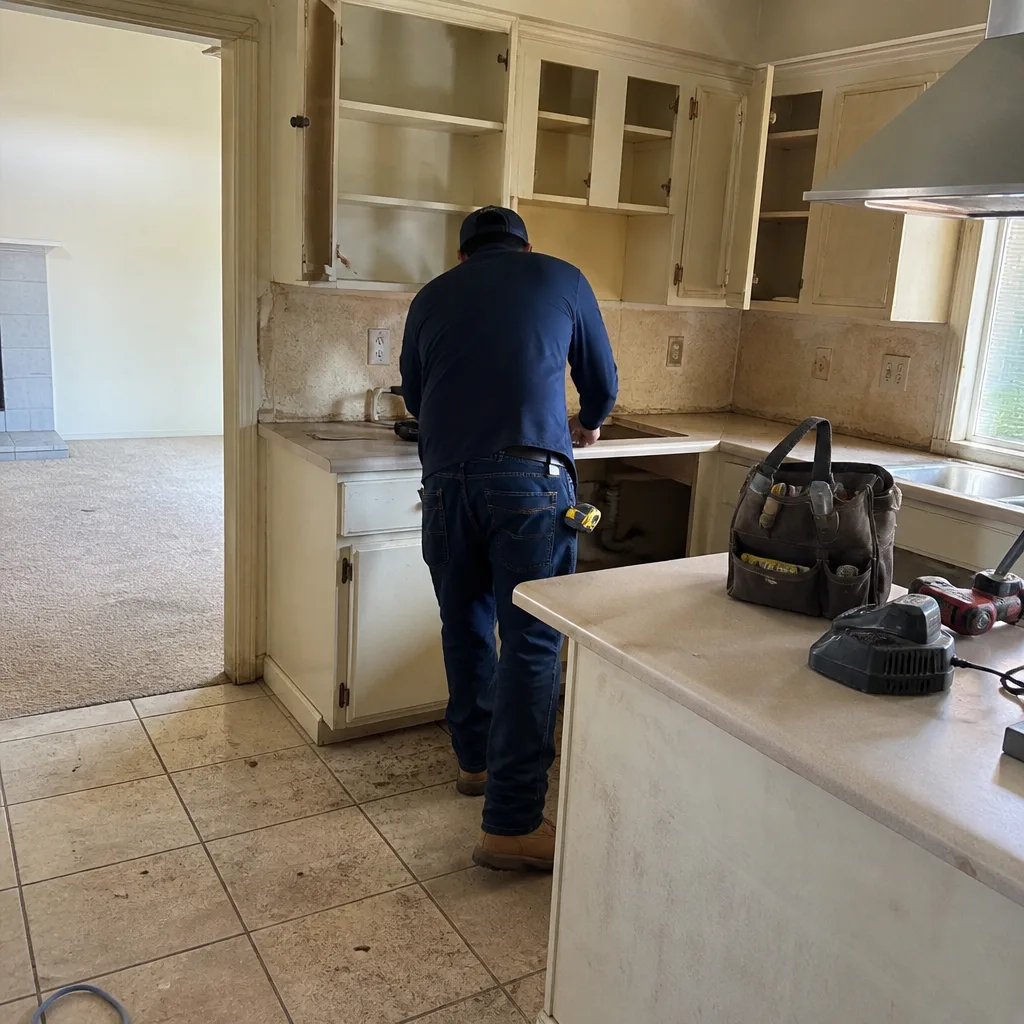 Before
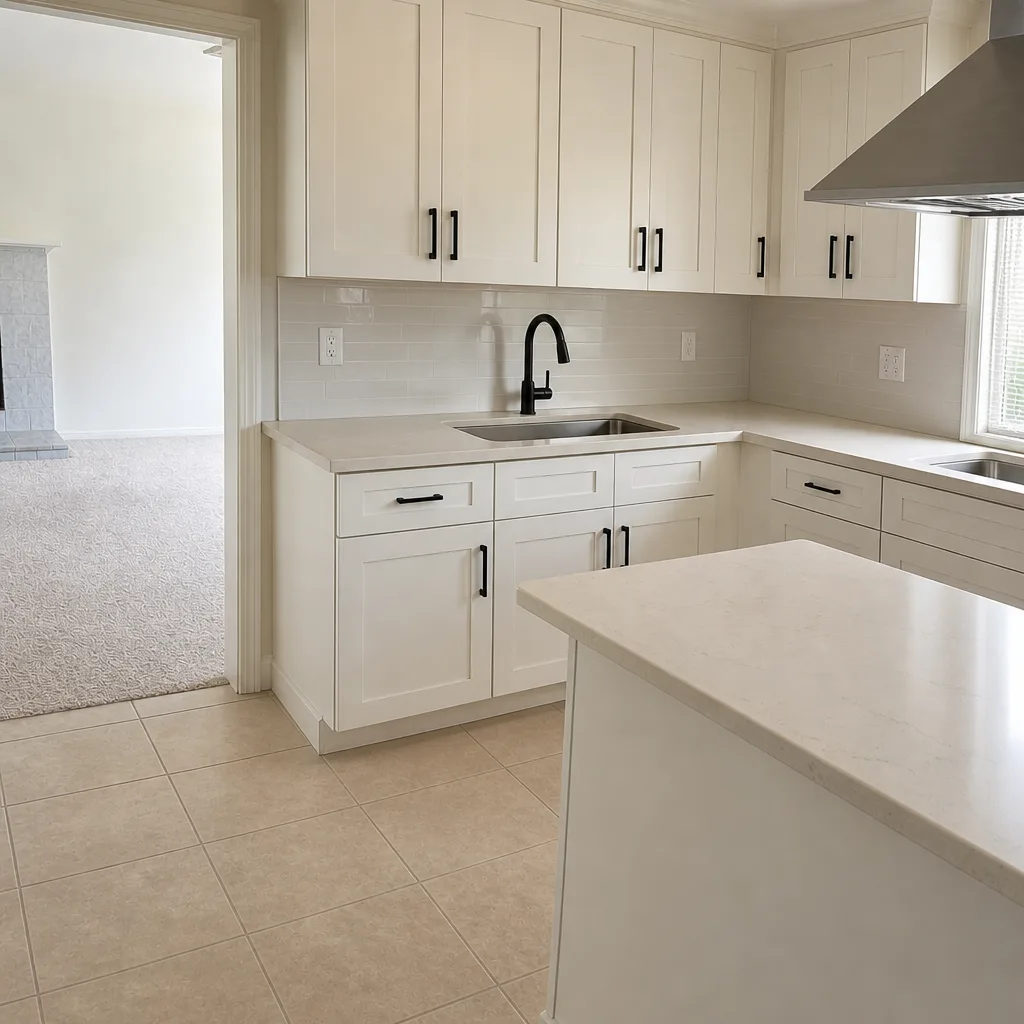 After
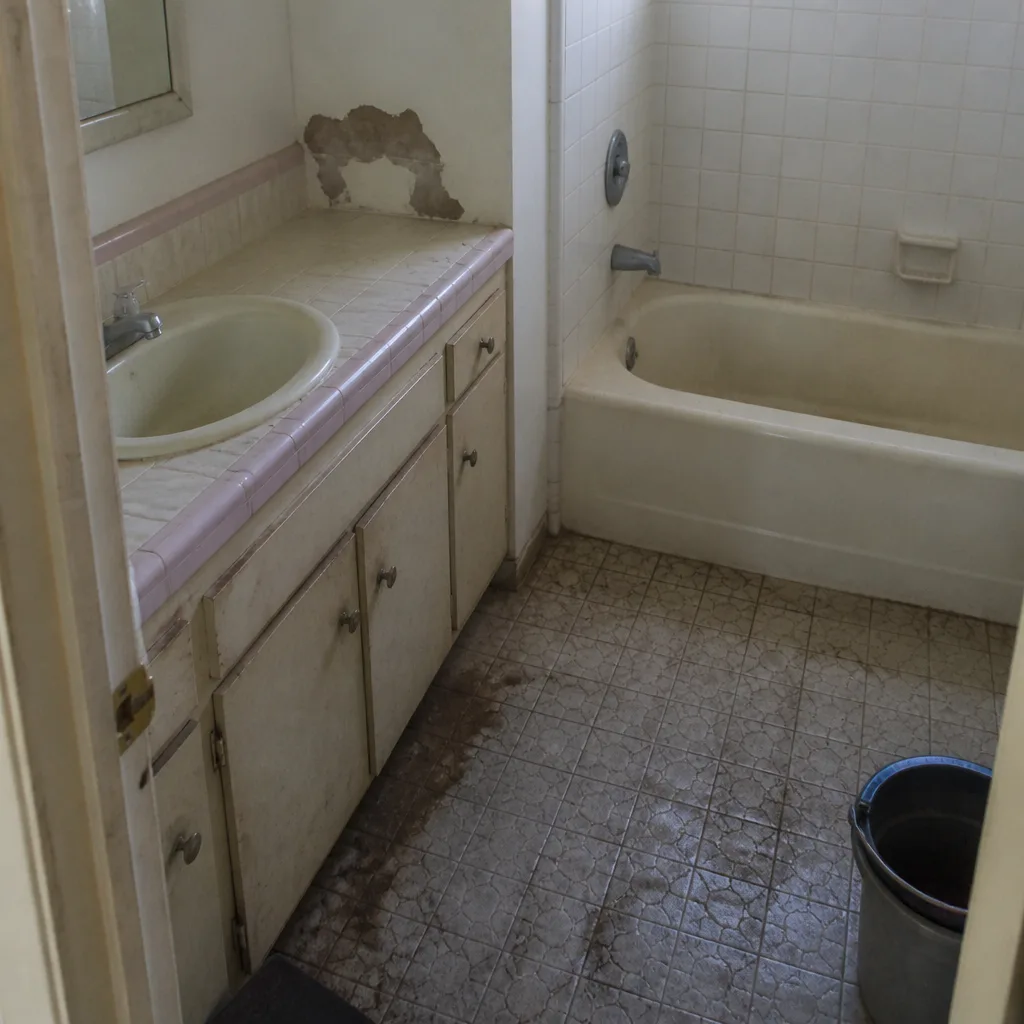 Before
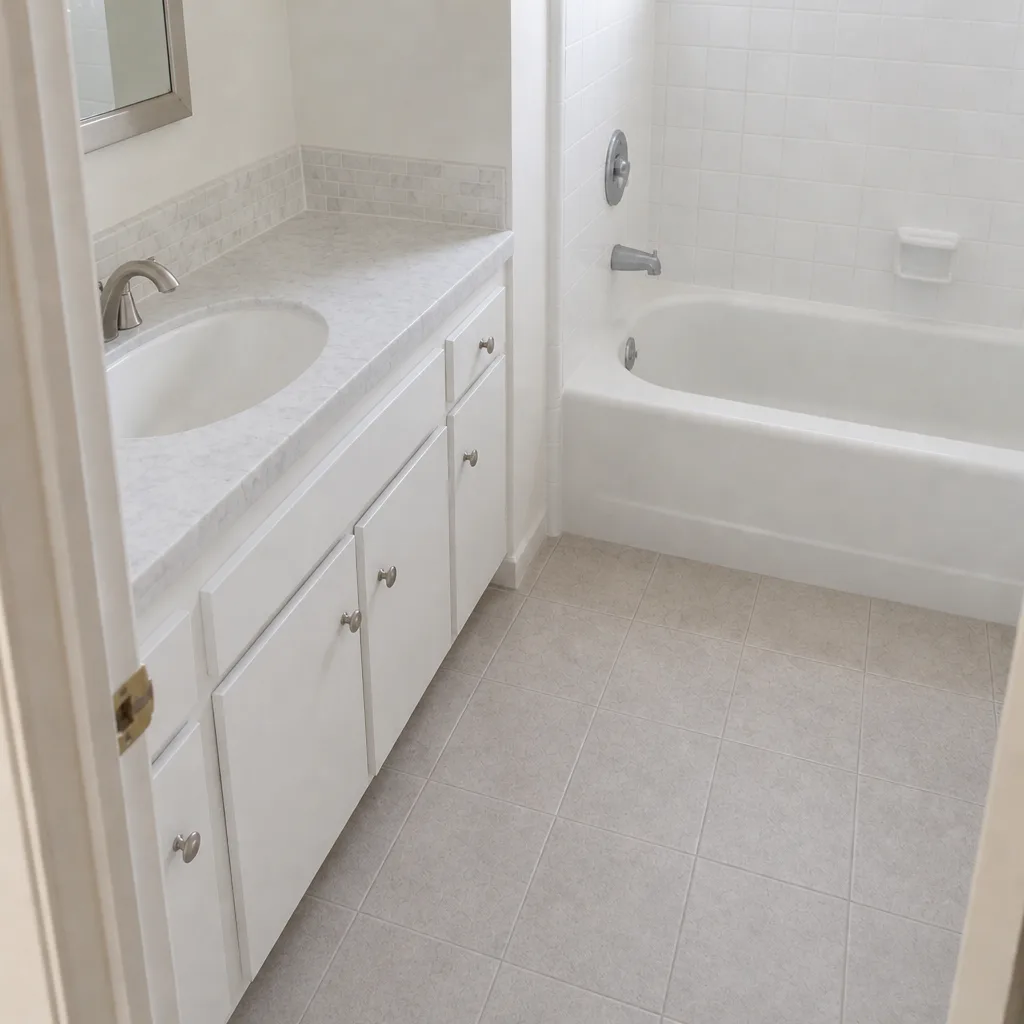 After
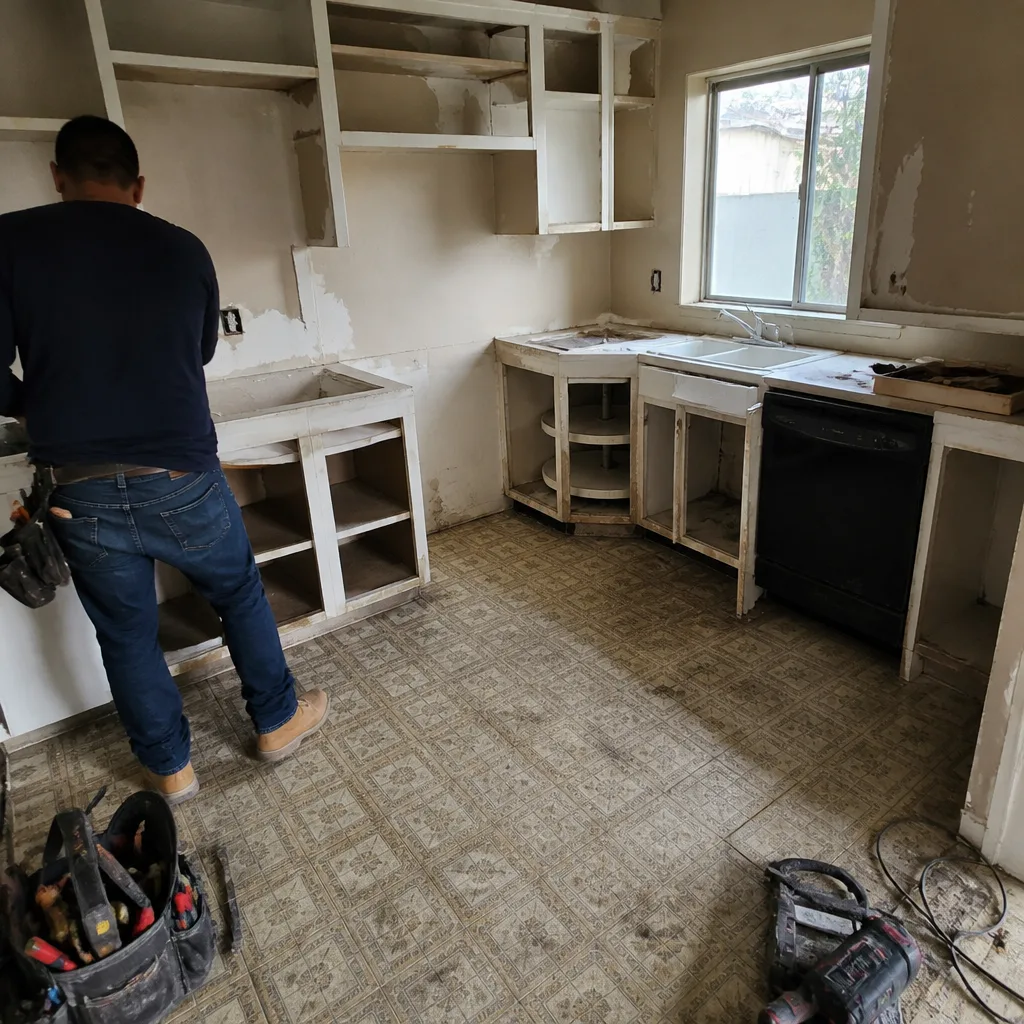 Before
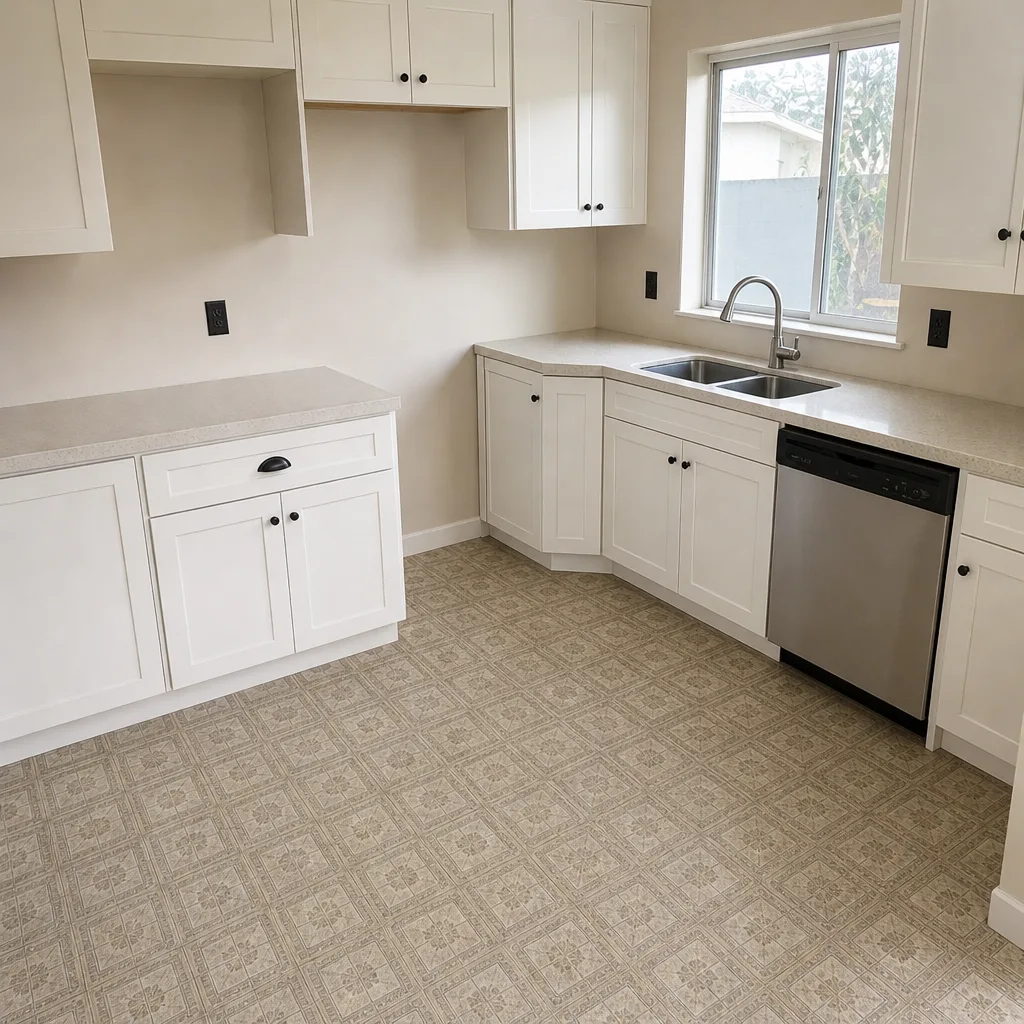 After
When to Call a Professional
Call a licensed professional the moment you find a range hood ducted into an attic or cavity, a panel that trips when normal kitchen appliances run, active water under a sink base, or cabinetry that’s visibly racked or unsafe. Electrical panel work, gas line work, and complex duct penetrations through the roof aren’t homeowner tasks – they’re the repairs where a mistake costs far more than a service call. If your project is still in the planning stage and you want the scope laid out before you sign anything, Bradford Remodeling Co Mission Viejo offers free estimates in Mission Viejo – call (833) 734-2429 to schedule a written scope and price.
Frequently Asked Questions
Re-ducting a range hood to an exterior wall or roof typically runs $650 to $1,800 in Mission Viejo, depending on penetration location, duct length, and whether the hood itself is upgraded. Call (833) 734-2429 for an exact quote – estimates are free, and the price is written before any work starts.
No. Adding a circuit means work inside the electrical panel, and that’s a licensed electrician’s job – panel work is where kitchen fires and serious shocks originate. A licensed electrician will scope the circuit addition, pull the permit, and get it inspected. Call (833) 734-2429 and we’ll walk you through what the scope typically includes.
Not on a Bradford Remodeling job. Every project receives a written price before work starts, and that price is the number you pay – no numbers that move at the door. If unexpected conditions turn up, we document them and get written approval before proceeding. Call (833) 734-2429 for a written scope and price.
Yes. Any scope that touches electrical, plumbing, gas, or structural work requires a permit from the Mission Viejo building department, and we pull them and hold the inspection sign-offs for you. You’ll have the permit number, the inspection reports, and a final sign-off in hand at close.
A sink base replacement typically takes one to two working days once the cabinet arrives – pull the sink, replace the base and shelf, install the waterproof liner, and reconnect supply and drain. Cabinet re-shimming usually runs a single day. Electrical circuit additions depend on the panel and may run two to three days including inspection.
Every completed Bradford Remodeling project carries a written full-year guarantee. If the work fails inside that 365-day window – a door that won’t stay aligned, a joint that opens, a repair that doesn’t hold – we come back and correct it at no charge. The guarantee terms are in writing and handed to you at close. Call (833) 734-2429 to see the guarantee language before your scope is priced.
The Bottom Line

Kitchen remodel failures almost always trace back to the rough-in – the ventilation, the circuits, the waterproofing, the framing under the cabinets – not the finishes. The incense test, a 10-minute breaker map, a look inside the sink base, and a 4-foot level across the face frames catch every one of the four root causes in this guide. If a repair has to happen, get it on a written price with a permit and an inspection sign-off, and don’t release final payment until the paperwork is in hand. That’s what being squared away looks like. For Mission Viejo homeowners who want it done by the book, Bradford Remodeling Co Mission Viejo provides free estimates – call (833) 734-2429 to schedule yours.
Written by the team at Bradford Remodeling Co Mission Viejo.